Showing posts with label lms. Show all posts

Friday, 2 October 2020

Create blended and flipped learning materials on the fly with TeacherToolsDigital

With the rapid and sudden increase in remote teaching and learning many schools and teachers are finding it hard to manage the smaller class sizes that remote learning supports and still give students the hours of study and practice they need to move their learning forward.

Many schools have turned to blended learning to fill the gap, but soon discovered that creating high quality blended learning courses takes time, money and a specific set of skills which many of their teachers don’t completely cover.

Luckily there is a solution to this problem that will enable teachers to create pedagogically sound online tasks and activities that can be adapted to students’ needs with minimal time and effort. The solution is TeacherTools.Digital.

TeacherTools.Digital has a great collection of skills based language practice activities that can be quickly adapted and deployed to get students producing language outside of class time whether it’s in a flipped, blended, hybrid, or fully online learning approach.

The site has eight basic activity types and these range from the usual gap filling types exercises to ones that students can submit using voice, text or even their video webcam.


The easiest way to get started with TeacherTools.Digital is to try some of the ready made and then just adapt them and add your own content and ideas.

If you click on browse underneath each activity type you can scroll through a range of activities. When you select one you’ll see how it is structured and then you can easily change the various elements of the activity to suit your needs.

One of my favourite activity types is the one that enables students to submit a video response using their webcam. I think this is a great tool to help students work on their visual communications skills and with the move towards more remote working, this is becoming a vital work/life skill for many of our students.


The Read Aloud activity type is also really useful as it enables you to set speaking activities for students that they can do at home and they get instant feedback on their performance as they read each line. This can increase their speaking practice time and reduce your homework marking time.

When you have created an activity you get a link that you can share with students and all of their results are tracked into the TeacherTools.Digital LMS, so you know how your students are progressing and which ones are completing their homework assignments.

As I said, I think this is a great solution to increase the amount of meaningful practice students have with language and to reduce some of the workload being placed on teachers.

You can try TeacherTools.Digital for free for 30 days, after that you’ll need to pay $9.99 a month (See pricing). This can be really worth the amount of time it can save you. At present there is no price on the  schools account, but it may be worth trying to get your school to enquire as substantial discounts are available when signing up multiple teachers from the same institution at the same time.

TeacherTools.Digital is also integrates with a wide range of LMS, so if your school already has a platform for building blended learning then it's quite easy to use TeacherTools.Digital to extend the range of activity types that you can offer.

As a special offer for readers of Nik's Quickshout. The good folks at TeacherTools.Digital are offering an additional 10% discount on top of the already discounted yearly rate of $99, bringing it down to only $89. What's more, your subscription will continue to renew at this price in subsequent years! 

This offer is only available to the first 25 users to redeem the following coupon code: PEACHEY-YEARLY-2020.

I hope you enjoy using this great tool and that it helps to reduce your workload and increase your students’ learning.

More Teacher Resources
You can find links to many more resources like this and activities for the digital classroom in my ebooks at: https://payhip.com/peacheypublications
To sign up for my free newsletter and get a free copy of Digital Tools for Teachers go to: http://eepurl.com/dtgL79
 
Check Out My Books:
Best
Nik Peachey


Tuesday, 31 March 2020

Add learning activities and games to your zoom classroom with Raptivity

In these difficult times when schools and universities are rushing to develop credible and engaging online learning, Raptivity 2020 looks like a really useful low-cost tool to enable that process.


Raptivity 2020 is a great content authoring tool and is capable of creating dynamic and media-rich learning that is adaptive across mobile, tablet and desktop screens.
One of the striking things about Raptivity is just how simple it is to create great looking materials. When you log in, there are two parts to the dashboard, one area where your work is stored and the other where you create content.

There are a good range of content types with a good balance between presentation formats and gaming/testing types.
Each content type has an example so you can see how it works and what it looks like to students and then you can just select the ones you want and customise them with your own content.

These are some examples of the presentation types:
  • Layered Display: This content type allows the students to choose from a range of topics within the main theme. Understanding sexual harassment.
  • Panning Slides: This content type is more like a linear presentation with a menu at the side so students can jump around a little. Example: Fruit and Vegetables
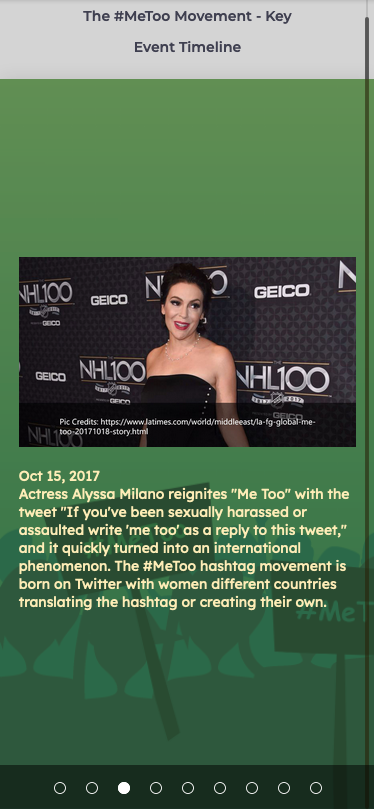
  • Horizontal Parallax: This content type is more like a timeline that students can work through. Example: The #MeeToo Timeline 

These are some examples of the game type activities:
  • This one is based around a bowling alley. Students answer question to get the opportunity to bowl and see whether they got the answer correct.  
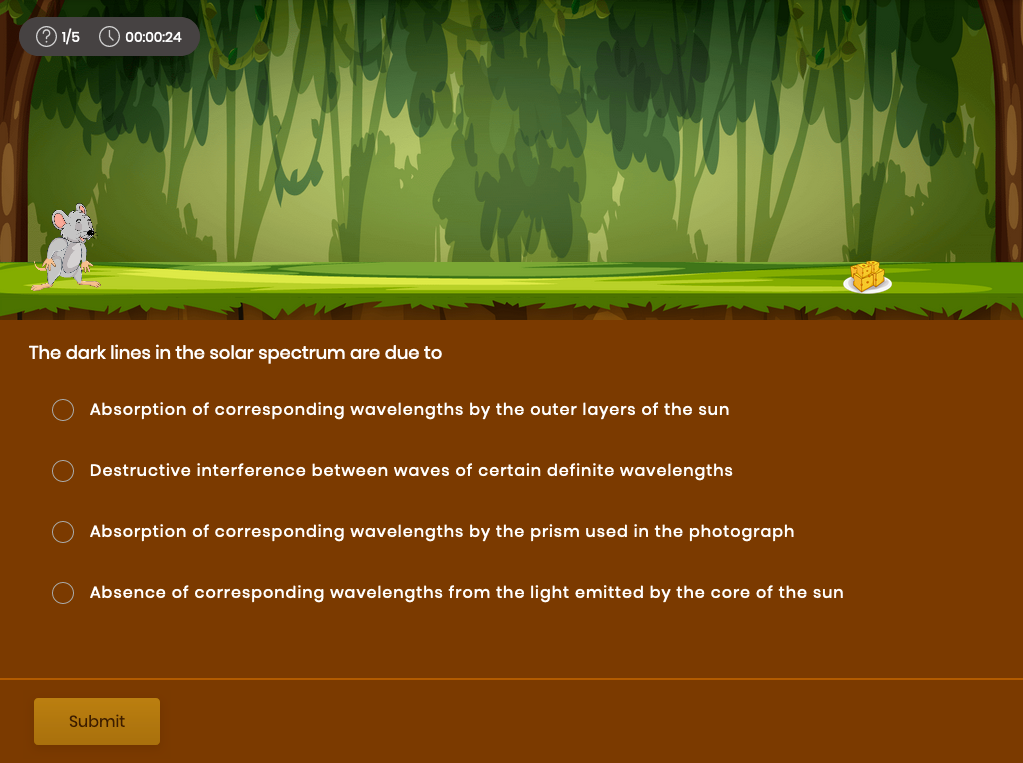
  • This one is based around a mouse trying to get cheese. Students answer questions correctly and the mouse gets the cheese, but if they make enough mistakes, the cat scares the mouse away. 

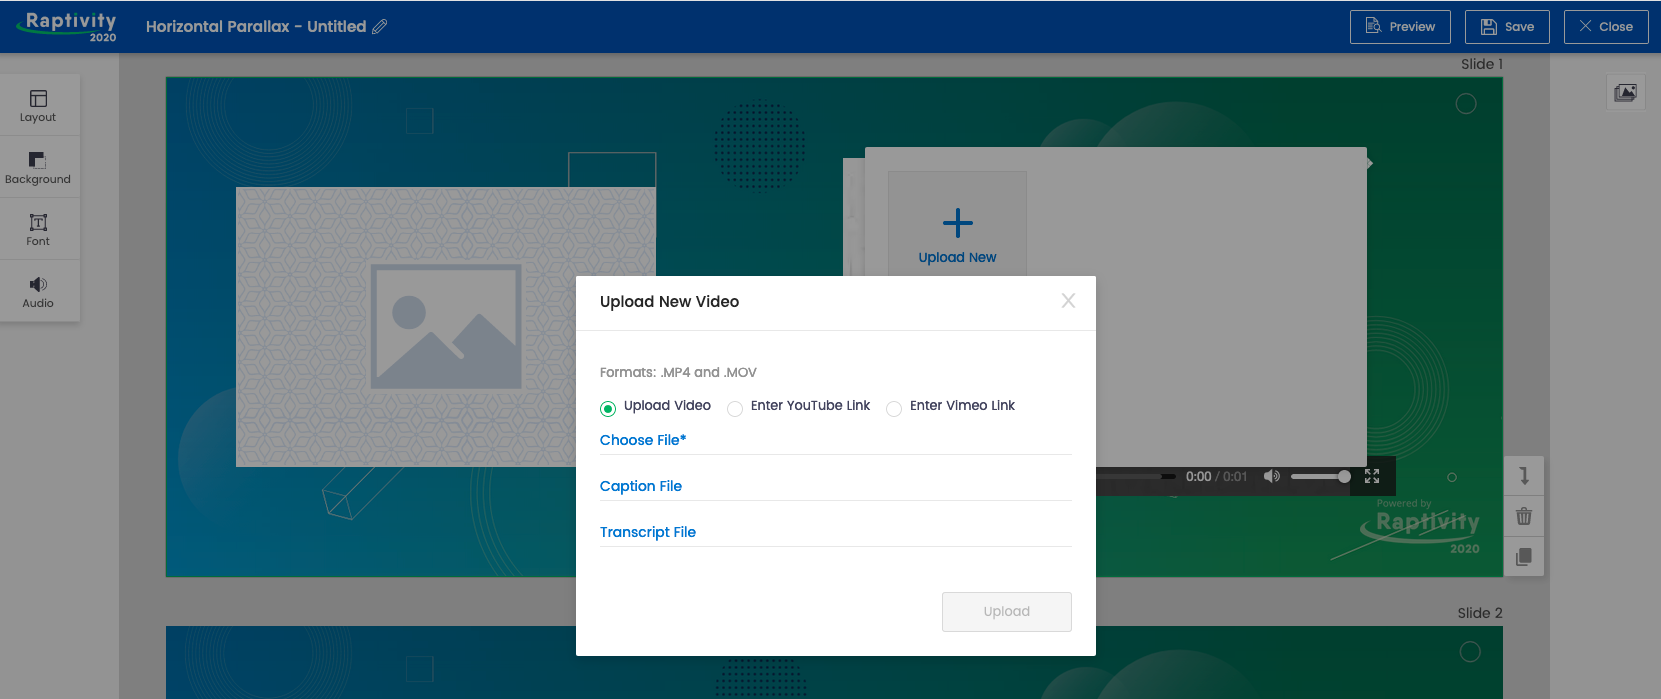
All of these content types can easily be customised with your own content. This includes adding audio narration for each slide and embedding your own video from social media.

Once you have added your content to the slides and games you can see what they look like on either tablets or phones in both horizontal and vertical mode.

Once you have saved your finished activities they are stored in the 'MyWork' section and from there you can either publish and share them through social media or email or export them for use in your own learning platform. All of the content produced is SCORM compliant.

You can also run the published content while screen sharing during a live class in Zoom or any other online classroom, or pass links to students through chat so they can do activities in pairs or breakout rooms.

Raptivity has a free 14-day trial which should be more than enough time to learn how to use the tool and produce some engaging content. Signing up for a year is very economical compared to other similar platforms. There doesn't seem to be a monthly plan at present, but at time of writing there is a 25% reduction.
Raptivity is well worth a try if you want to quickly create online learning content that's both engaging, media-rich and which looks fresh and professionally designed.

You can find links to many more resources like this and activities for the digital classroom in my ebooks at: https://payhip.com/peacheypublications
To sign up for my free newsletter and get a free copy of Digital Tools for Teachers go to: http://eepurl.com/dtgL79

Check Out My Books:
Best
Nik Peachey

Friday, 28 February 2020

Actively Learn - A Huge Resource of Ready-Made Interactive Learning for English Language Learners

Actively Learn isn’t just a great source of learning content for grades 6 through to 12, though if you are teaching adult learners much of the grade 12 content would still be appropriate. It’s also an LMS that enables you to create and track the use of learning materials across your classes, and a teacher development tool that enables you to train teachers in aspects of materials development and instructional design.

Ready-Made Content for ELA

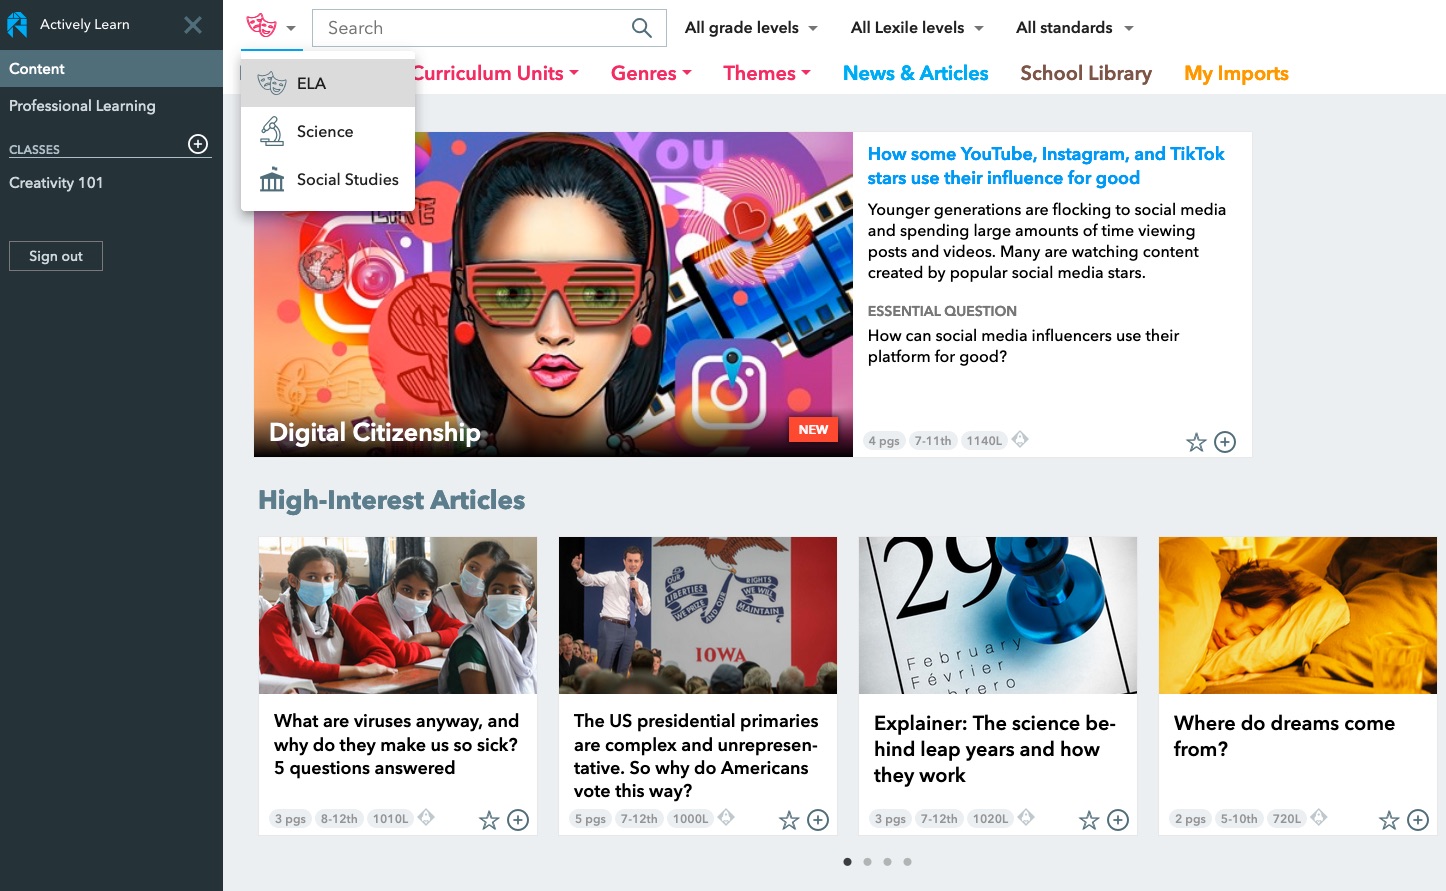
Actively Learn already has a really substantial amount of readymade interactive learning content when you log in. The content is easy to browse or search, initially by subject (ELA, Science or Social Studies) and then by a range of different parameters, from grade to topic to theme or genre.


Once you have found some interesting looking content for your students you can click through to see the activities that have been designed for it and the guidance notes for the teacher. There is also a brief introduction to the text. The questions that you can see as you scroll through the text are interactive and when the text is assigned to the student their responses will be tracked into the reporting part of the site.

If you want to change some of the questions or add cultural notes or word definitions through the text you can also do this, just click on the ‘Customize’ button at the top of the screen.

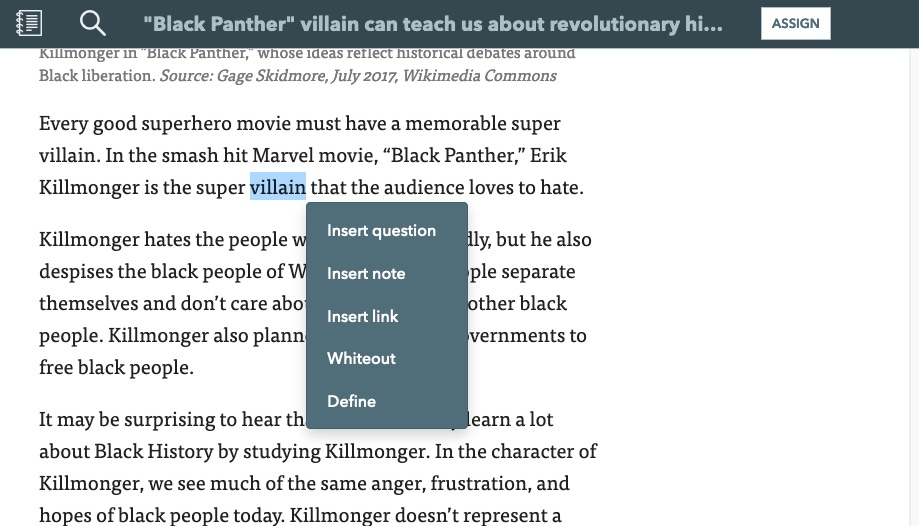
To add notes, questions or definitions to words, just highlight them and you will see a menu appear.


Once you have your text and all of the tasks ready, just click on ‘Assign’ and the text will be sent to the class that you choose.

Creating Classes and Measuring Learning

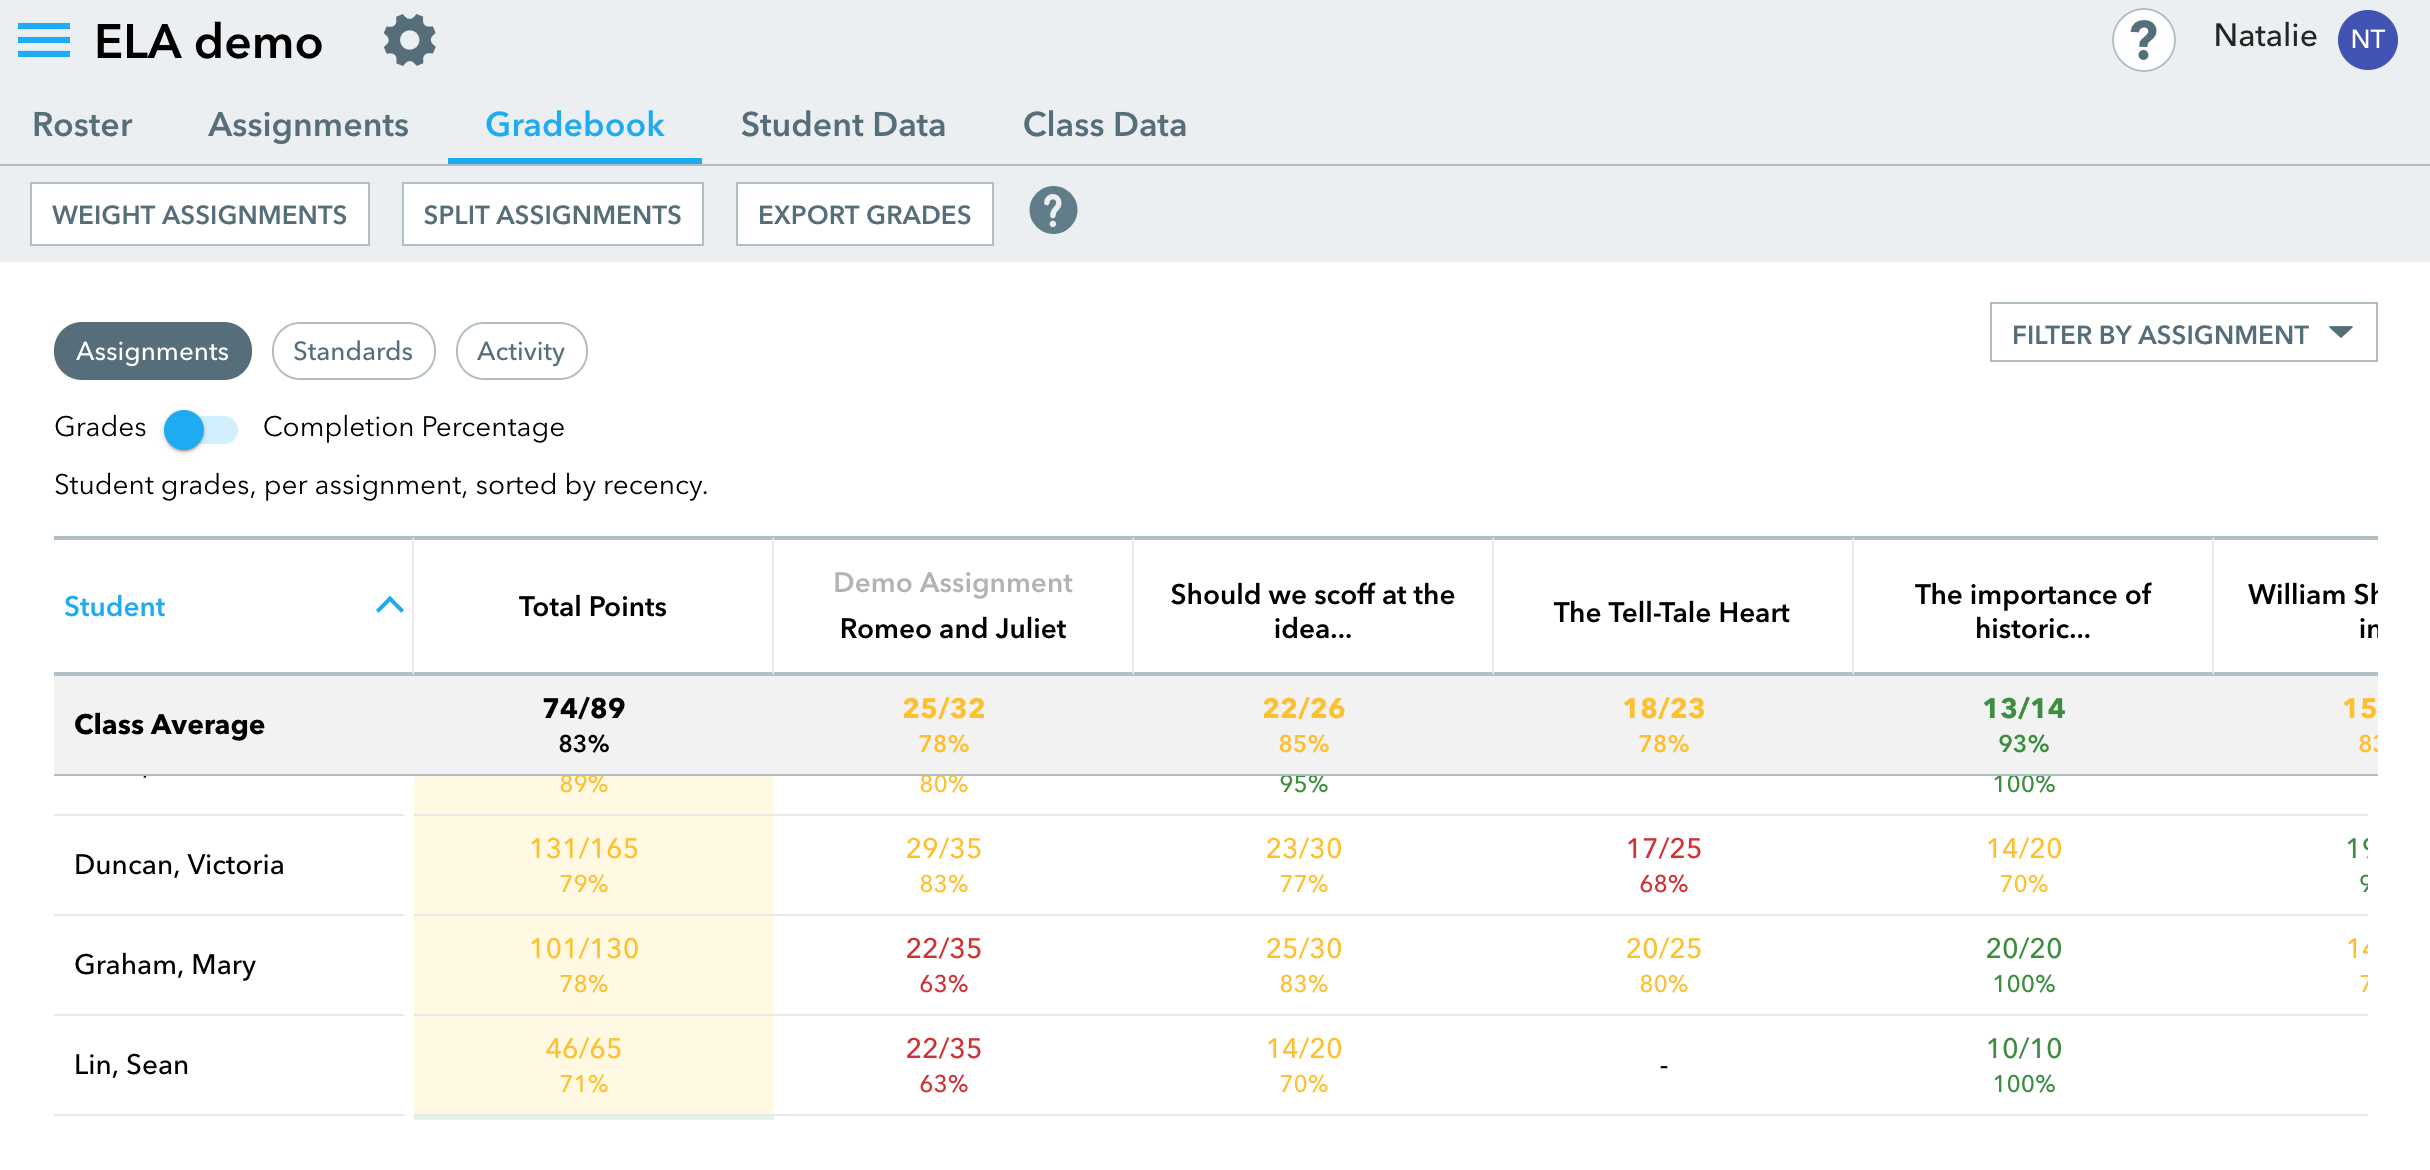
Setting up classes is simple. Just click on ‘Add new class’ on the main menu and you’ll be able to give the class a name and select the grade of the students. You get a simple code to give to students that enables them to enroll in your class. Once the students start to interact with the content you’ll be able to track their work through the Gradebook and Student data. You can also get an overall view of the class data.


Creating and Customizing Content

Actively Learn isn’t just for the development of reading skills though, you can also access or create your own content based around online video. Just select ‘Video’ on the ‘Genre’ tab and you’ll see the selection of ready-made video content. When you select a video you’ll see that it has question marks beneath the video play bar. When the students get to this point in the video it will pause and show them a question. By clicking on ‘Customize’ and then clicking on the play bar you can either edit or add new questions to the video.

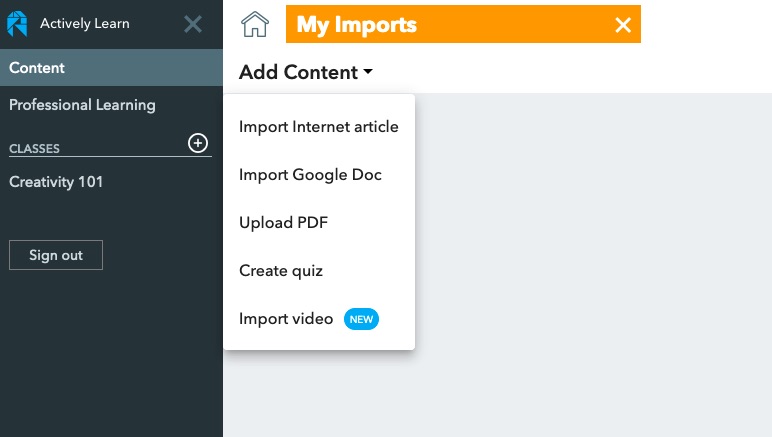
If you decide you want to add your own content, then click on ‘Import’ and select the type of content you want to add. You can then start to add interactions and questions to it before assigning it to a class.


Actively Learn for Teacher Development

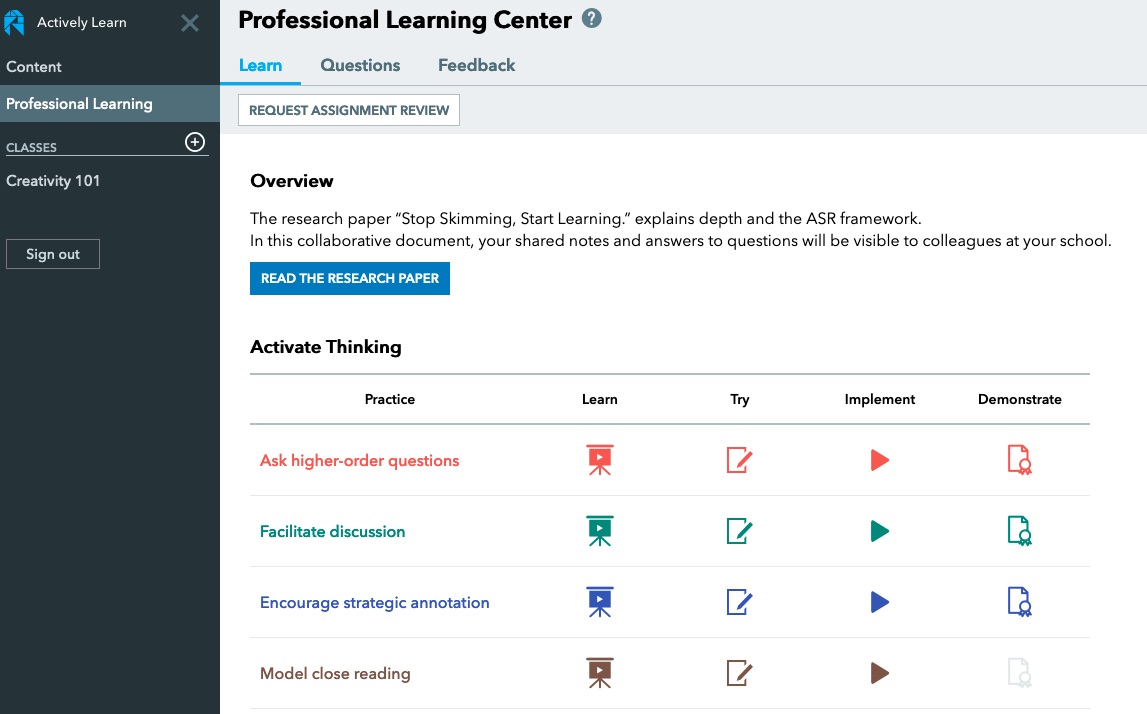
As I said at the beginning of this article, Actively Learn is also a tool for teacher development and has some really well-structured learning activities for teachers that will help them use the platform more successfully. To find these materials click on ‘Professional Learning’ in the menu.

The Professional Learning section starts with a research paper that teachers can read and comment on. The interactions around this paper will be shared with other teachers who are registered at the same school. The platform then has a collection of sequenced activities that teachers can work through to develop different aspects of their professional knowledge whilst helping them to use the platform more effectively with some ‘hands-on tasks’.


Actively Learn Plans

Actively Learn is a pretty impressive platform with a great and constantly growing bank of materials. As a teacher you can sign up for an individual account and use Actively Learn for free, but for the real power of the platform, along with API integrations into Google Classrooms, SIS or another LMS, you’ll need a premium plan. These plans are negotiated with schools according to what elements of the platform and integration they need and the number of students involved. At the school level, it’s clear to see how Actively Learn could have really clear and measurable benefits that could have genuine impact on students’ learning.

You can find links to many more resources like this and activities for the digital classroom in my ebooks at: https://payhip.com/peacheypublications
To sign up for my free newsletter and get a free copy of Digital Tools for Teachers go to: http://eepurl.com/dtgL79

Check Out My Books:

Wednesday, 8 January 2020

Eduflow for building online, blended and flipped courses

If you are looking for a fast and simple way to build online courses or digitise your existing courses then Eduflow could be the tool for you.

What I really like about Eduflow is that it takes a lot of the work out of the course construction process by having ready-made blocks or 'flows' that you can just select and add your content to.

Using Eduflow to create an online course

To create a course on Eduflow, just register and then click on 'Create or Join'. This will enable you to give your course a name and create it.

Once the course is created it simple to add activities to it, just click on 'Add activities & flows'.


You can then add content to your course. Content could be a mixture of text, images, links videos or you could upload a file for students.

Once you have created your content you can set up rules to define when and for how long students can access the content. This is really useful if you want to blend the course with work you're doing in the classroom and ensure that the online work is done at a specific time. It should also help to reduce student procrastination, which is one of the big negative impacts of online learning.
Once the content is created you can use flows to define how your students will respond to it and who and how their response will be evaluated.

There are two kinds of ready-made 'flows'. These are peer-reviewed assignment flows or instructor reviewed assignment flows.
The flows are in three parts: The student submits their work, the work is reviewed either by a peer or the instructor and then the students submit a reflection on their feedback. This three-part flow really encourages deeper learning and puts far more emphasis on the quality of feedback and understanding rather than just whether students have got things right or wrong. Again this approach helps to combat one of the most common weaknesses of online courses that rely on computer configured responses to students' input.

If you aren't happy with these flows or you want to customise them you can create your own or add additional stages.

Once you've created your course content and assignments you can easily add students to the course by giving them a simple link or you can invite them by email.

Tracking student progress is also simple and you can also set up notifications so that you know when student work has been submitted.

So that's how to create a course with Eduflow

  • Eduflow looks like a great tool to create blended or flipped courses on the fly as you teach the face-to-face element of the course.
  • You could set up a totally online course and invite your students via email or a link.
  • Eduflow's focus on feedback and reflection also makes it an ideal e-portfolio tool to collect student work over the semester.

What does it cost?

You can use Eduflow for free to create two courses for up to 50 students. After that, you do have to pay, but prices are very reasonable so whether you want to use it for a whole school solution or to get started delivering online courses independently, then Eduflow is a great, fast and easy to learn solution to get you up and running quickly.

You can find links to many more resources like this and activities for the digital classroom in my ebooks at: https://payhip.com/peacheypublications
To sign up for my free newsletter and get a free copy of Digital Tools for Teachers go to: http://eepurl.com/dtgL79

Check Out My Books:


Best
Nik Peachey


Monday, 15 April 2019

Ediface - The Whole School Solution

Are you looking for a simple IT solution that can help drag your school into the 21st century? If you are then Ediface may be what you are looking for.

Ediface has been designed to support the complete curriculum and manage students across subjects. It's able to track students on their complete journey through the school experience.

Once students have been uploaded they can be easily added to classes and teachers can assign a range of digital materials to them.

As well as homework assignments which can be posted, tracked and marked through the platform, teachers can also set up their classroom materials and slides. These can be shared across the school, enabling considerable time saving and the development of a community of practise among your teachers.


Then it's easy for teachers to launch lessons which students can then work through on any digital device. lessons can be media rich and include video content, audio and images. Teachers can also set up simple test questions to check understanding at the end of each unit of work or at the end of term.

As and administrator, it's easy to come into the platform and see how students are doing across topics and as your bank of data grows you will be able to measure the overall impact of teaching within the school and make decisions about curriculum changes that are based on data rather than instinct.

Ediface is an efficient solution to what is becoming a complex problem. It isn't free, but they do have a very simple per student per year pricing plan and you can get up to 50 students registered before you have to pay, so that's enough for a pretty good trial or for a single teacher to run their class.

I hope you find Ediface useful and that it helps to make life in your school a little easier.

Sign up for my monthly free newsletter and get more tips and reviews like this one and a free copy of Digital Tools for Teachers at: https://tinyletter.com/technogogy/

Check out my ebooks:


Best

Nik Peachey


Friday, 30 November 2018

Epigrammar - Making assignment marking quick and collaborative

If you have a lot of student assignments to mark, and especially if many of them have been handed in on paper, then Epigrammar is going to be a great tool for you.

Epigrammar has been designed to take a lot of the sweat and monotonous repetition out of homework marking. Basically, what Epigrammar does is enable you to create classes for your students where you or they can upload their homework assignments and you can add comments to them. That doesn’t sound so unusual, but Epigrammar can also allow you to create a bank of comments that you can reuse so that you aren’t having to write the same thing over.
Another great feature of Epigrammar is that it isn’t restricted to text type documents, so if your student has done their homework on paper or even if their homework is a sketch or painting, you or they can take a picture of it, upload it to the platform and then you can add comments and marks.

Another nice feature of Epigrammar is that you can make some assignments ‘shared’ so that students can see what their peers have uploaded and even add their own comments and suggestions.

The other great time saver though is that at the end of the term or semester when it’s time to write up a report about your students’ work, Epigrammar can automatically generate suggestions for these based on the comments you have made on their written work. Then all you have to do is drag and drop in the ones you want to use and edit them.

To get started, you just need to register and then set up a homeroom. Once your homeroom is created you can generate an invitation code and students can then use this to register on the site. This code adds them to your class.

You can then either share documents for them to comment on, or they can upload their work to the site for you or their peers to comment on.

Comments are added by dropping coloured pins on the document and then writing in and saving to the right of the screen.

All of these comments then become visible to the student(s) on the left of the screen.

Here’s a link to a video tutorial that goes into more depth on the process of generating reports: https://epigrammar-1.wistia.com/medias/xrw1lvexa7

It’s clear that the more you use Epigrammar the more time it is likely to save you and the more efficient the whole process will become. A bonus feature of the site is that you and your students will also be creating a form of e-portfolio that will enable you and students to look back over their work and assess progress.

Epigrammar has a free subscription which should enable you to test it out with a group of students, but to be useable at scale you will need to subscribe. The price though seems very reasonable when comparing to the value of your time and the amount of it you are likely to save by using the platform for all your marking.

I hope you and your students enjoy using Epigrammar and that it doesn't just save you time, but also increases the overall impact of your marking.

You can find more tools like this and advice on how to train teacher to use them in my ebook.


Buy Now

I hope you find it useful.

Best

Nik Peachey


Tuesday, 6 February 2018

Cikumas - A Free LMS Designed By Students

We spend a lot of time researching and talking about what teachers need from technology but we often forget that our students, who spend the years of their education watching various teachers struggling to get to grips with technology, have a unique insight in to what works for them and where things are going wrong. That’s why it’s great to see Cikumas, an LMS created by two students to produce the kind of classroom environment and activities they want as part of their learning process.

Alexander Degenhardt and Noah Liebherr, developed Cikumas due to the frustrations they felt in their classroom. Although they experienced multiple online solutions as learners, they didn’t feel that these catered to the needs of students, so they took the opportunity to create their own solution.


How to use Cikumas

Cikumas is a very clean and easy to use LMS that allows teachers to create media rich  interactive content, distribute it to their students either in class or for homework and then monitor their results and responses.

Unlike many other LMS such as Moodle, the learning curve for Cikumas is pretty gentle and once you log in you should be able to create some interactive content for your students pretty quickly.

When you first log in to Cikumas you go straight to the dashboard. Here you can see any active assignments that your students are working on as well as your calendar and your personal to-do list.
To start creating content and courses for your students just click on the ‘Library’ icon. This is where you will be able to store and curate all of your lesson activities and materials.
To create a lesson or activity just click on ‘Add New,' then give your activity a name, choose the topic area and add a description. You can come back and change these later if you need to.
Now you can add four types of content to your lesson. These are Text, Question, Media or File.
The text blocks have a simple to use editor that allows you to format any text content and add images and hyperlinks to external content.

Media allows you to add the usual video, image or audio files, but also mathematics equations. When adding media you can do this either from your computer, your Google Drive or from online sources such as YouTube, or in the case of images, through a Google search. You will need to allow access to your Google account to do this though.

Adding files is equally as simple and you just drag and drop any file types you want student to access and they will be uploaded.

Where Cikumas starts to get really interesting though is when you start adding question types.

There are four main types of question you can add.

Mutiple choice - These are the usual single select, multiple select, yes/no and true/false types. To create one of these questions you just click on the type you want and then add you question and answer options. You can also select how many points the students are awarded for a correct answer.
Fill in the blanks - There are two kinds of blank filling question types. You can choose to create a text with gaps the students have to type into or you can select which words are extracted from the text and then students drag the words back in to the spaces.
Classify - There are two types of classification question types. You can either get students to drag and drop text labels to images or they can order parts of a text.
Free response - There are two types of free response. You can either get students to type an answer into an open field or they can record and audio response.
These interactive question types are ideal for language learners and teachers and enable you to quickly create very professional interactive content.

Once you have created your lessons and activities, you can go to ‘My Classes’ and create your classes and invite students to them.
The ‘My Classes’ part of the site is where you will come to monitor your students results and grade their responses, but there is also a class wall where you can make announcements to the class  and post and share interesting materials. This can help to keep students engaged with a wider range ad-hoc learning materials and keep them up-to-date on any course changes or assignments.
Even as an experienced Moodle developer, I found that creating materials within Cikumas was much quicker and simpler. It doesn’t have the level of customisation that a platform like Moodle has, but for teachers who just want to get straight down to creating learning materials it’s a much simpler and more direct route to creating motivating learning that looks really professional and is easy to manage for both teachers and students.

I hope you enjoy using Cikumas for your students and that it helps you to save some time and deliver interactive classroom and homework assignments.

My Books:

 Best

Nik Peachey


Thursday, 23 November 2017

Build Speaking & Pronunciation Tasks into your Moodle Course

SpeechAce is a great Moodle plugin for anyone who wants to build speaking and pronunciation activities into their online course.
The plugin allows you to build tasks and activities into your Moodle course that require a verbal response, these can be listen and answer, listen and repeat, watch multimedia and answer,  and which gives students useful constructive feedback on their pronunciation.
Students simply click to record their answers or input, this can be the answer to a questions or can be based around a text they have read or a recorded model (UK or US accent) they have listened to and tried to imitate.

They then they get a score and an analysis of their answer. They can get word by word feedback on their performance and see which phonemes they produced successfully and which they still need to work on.

Installing the plugin is pretty simple and then you just select it from the main tasks menu whenever you want to add a speaking activity to your course.


If you build it into a tutored course the students scores are recorded in the grade book and teachers can go and listen to their recordings too. This can really make teaching preparation effective in a blended learning course.
Like many teachers and language course designers, I’m usually pretty sceptical about a computers’ ability to evaluate student speaking, especially given the range of variation in native speaker output, but I think SpeechAce does a really good job of getting students to produce language, giving them feedback on their performance and encouraging them to listen and try again. Building this kind of capability into an online language course, especially a MOOC type one that has much less teacher contact, could really help students to stay motivated and engaged for longer.
 

Video demo

If you want to give it a try as a teacher then go to: https://playground.speechace.com/moodle/ where you can get access to the SpeechAce sandpit.

If you want to try it as a student then go to: www.speechace.com/pc and you can try a demo placement test.

I’ve known about SpeechAce for a couple of years now and it’s great to see how it has developed. It isn’t free (there is a free trial), but the company is clearly putting their money into developing a constantly improving product and I think that’s something worth supporting.

You can find 100 + more tools and resources like this in my ebook Digital Tools for Teachers - Second Edition or if you want to train other teachers to use these kinds of tools check out the Teacher Trainers’ Edition.


My Books:
 Best

Nik Peachey